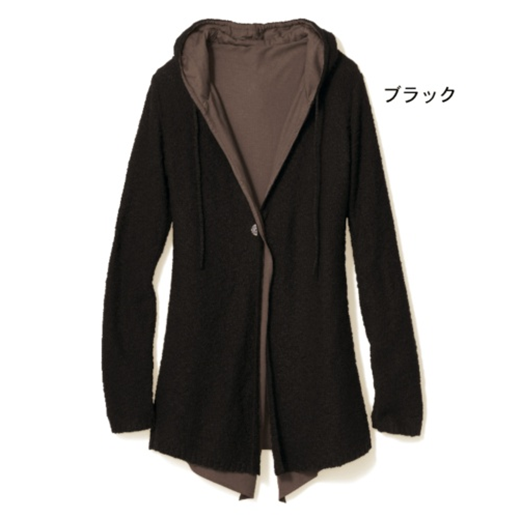
For this demo, I'm focusing on processing apparel website images, which are usually taken with a fixed color plain background. This will be very important as the current algorithm won't give very good results when the image has some background elements.
The script will try to obtain the item "main" color from the image. We will define "main" color as the dominant color of the pixels composing the item pictured. I.e: a photo of a red t-shirt with a white background should obtain the red color, even if the amount of white is bigger in the image.
The purpose behind this demo was trying to obtain a classifier that would detect automatically the color of an item from its image so we could feature a color-matching recommendation engine for apparel EC-sites.
A more detailed presentation can be found following this link: Angel_Raposo_Color_Detection
UPDATE 05/March/2013: I have included a set of 100 random items tested against the script at TEST RESULTS
UPDATE 09/March/2013: I finally found time to push the first draft version of the script at Google code. I will try to improve this first draft as time allows as it's not yet very efficient.
STEPS FOLLOWED IN THE COLOR DETECTION
(1) IMPROVE BORDERS DETECTION
The color detection process will user border detection algorithms to remove the background pixels of the image that are not useful for our goal. To increase the efficiency of the border detection algorithm, we will apply several filters to the original image:
(1.1) Apply a Gaussian blur filter to remove noise in the original image.

(1.2) Stretch the image produced in the prevous step by 15 pixels to increase border areas.

(1.3) Create a second image from the original one converted to grayscale (binary image mode).

(1.4) Apply a threshold -> Increase border visibility by merging both images (1.2 + 1.3).

(2) CREATING A MASK OF USEFUL PIXELS
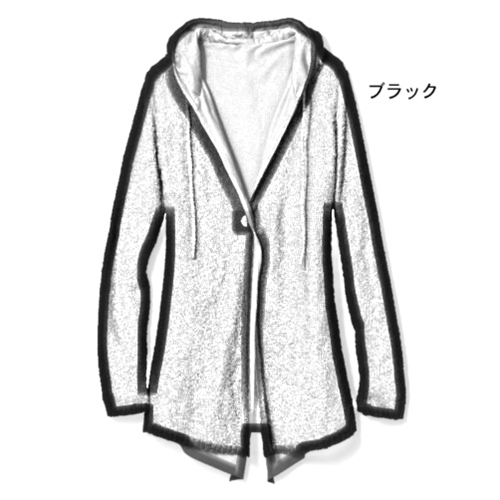
(2.1) Detect borders with PIL
Once we have the enhaced image ready for the border detection, we will pass it to PIL. There are other mathematical methods to detect borders in the images by using more powerful libraries as OPENCV but according to the tests applied PIL is a good option for appearel websites as our initial assumption says that the image will have a plain background.
After applying PIL we obtain the image borders:

We will use now the image with the borders detected to create a template without the background pixels. As we are assuming that the background has a fixed plain color, we can use the borders detected to know where the item is located inside the image as well as all the pixels that are part of it.
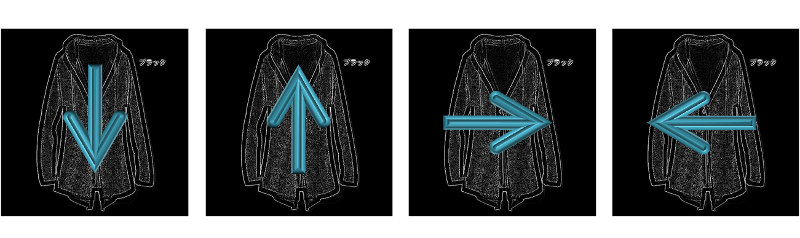
For this step, I decided to start with a simple solution not very optimal: we will parse the image from 4 directions (top, down, left, right) removing all pixels from the image until we find a border.

(3) READ THE VALUES OF OUR "USEFUL" PIXELS
The previous step 2 provided us with a mask of pixels that indicates us which ones are useful for our calculation and which ones are considered background. Each one of the pixels marked with a black color are useful pixels so we can use this information with the original image to obtain the color data of all useful pixels.
(4) CALCULATE THE COLOR BASED ON THE PIXELS READ
When we take a photo of an item, there are many conditions affecting to the luminosity captured on each pixel in the camera. For a fraction of a second, the camera len opens allowing the photo sensors to capture a level of photons that will determine the color detected at that pixel.
In example, a photo of a red apple (#FF0000) will produce a slightly different tone of red on each pixel (even for two adjacent pixels). For that reason, we can't just count the pixels to see which is the most repeated color as it's likely that all pixels will have a different color.
To obtain our item's color, we will organize the extracted pixels' colors in a cluster so we can see where are most of the points accumulating. Following the apple example, all pixels will probably be different but almost all of them will organize around the "red cluster"
After that, as we need to give a final value, we will return the center of the biggest cluster generated.
No comments :
Post a Comment